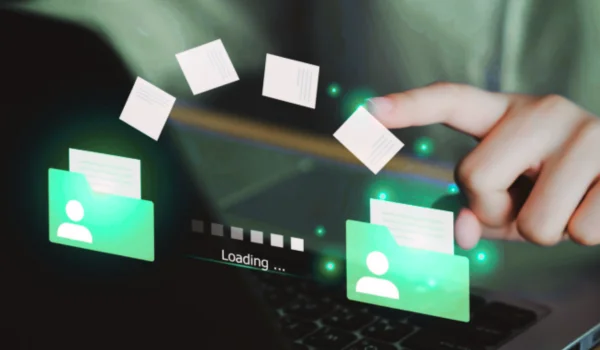
Opening a Demat account in India has become fast, paperless, and beginner-friendly. In most cases, you can complete the process in 10–15 minutes using your phone.
But here’s where many people get stuck:
👉 “What documents do I actually need?”
👉 “Why is my application getting rejected?”
In this detailed guide, I’ll walk you through the complete list of documents required, along with practical tips, common mistakes, and pro insights—in simple Indian English for both beginners and active traders.
🧠 What is a Demat Account
A Demat account is used to store your shares in electronic form. It is maintained by depositories like:
- CDSL
- NSDL
You open this account through brokers like Zerodha, Groww, or Angel One.
📄 Full List of Documents Required for Demat Account
Let’s break this into mandatory and optional (but important) documents.
✅ 1. PAN Card (Most Important Document)
👉 Mandatory for everyone
- Acts as your primary identity proof
- Required for tax tracking
- Must be linked with Aadhaar
📌 Without PAN, you cannot open a Demat account in India
🆔 2. Aadhaar Card (For e-KYC & Verification)
👉 Used for:
- Address proof
- OTP-based verification
- Digital KYC
📌 Your mobile number must be linked with Aadhaar
🏦 3. Bank Account Proof
You need to link your bank account for:
- Adding funds
- Receiving withdrawal money
Accepted Documents:
- Cancelled cheque (most common)
- Bank passbook
- Bank statement
📌 Name on bank account must match PAN
📸 4. Photograph (Digital Selfie)
👉 Required for identity verification
- Live selfie during KYC
- Clear face visibility
- No blur or filters
✍️ 5. Signature
👉 Used for verification
- Upload on white paper
- Must match PAN records
- Avoid stylish or mismatched signatures
📊 6. Income Proof (Required for Trading in F&O)
👉 Only needed if you want:
- Futures & Options (F&O)
- Intraday trading (in some cases)
Accepted Income Proof:
- ITR (Income Tax Return)
- Salary slip
- Bank statement (last 6 months)
- Net worth certificate
📌 Not required for basic investing
📊 Complete Document Checklist Table
| Document | Mandatory | Purpose | Who Needs It |
| PAN Card | ✅ Yes | Identity + Tax | Everyone |
| Aadhaar Card | ✅ Yes | Address + eKYC | Everyone |
| Bank Proof | ✅ Yes | Fund transfer | Everyone |
| Photo | ✅ Yes | Verification | Everyone |
| Signature | ✅ Yes | Authentication | Everyone |
| Income Proof | ❌ Optional | F&O trading | Traders |
🚀 Step-by-Step: How Documents Are Used in Account Opening
Here’s how your documents are actually used 👇
Step 1: Enter PAN Details
- System fetches your basic info
Step 2: Aadhaar OTP Verification
- Confirms identity
Step 3: Bank Verification
- Ensures fund transfer safety
Step 4: Upload Photo & Signature
- Completes KYC
Step 5: Income Proof (Optional)
- Enables advanced trading
⚠️ Common Reasons for Rejection
This is where most beginners struggle 👇
❌ 1. Name Mismatch
- PAN vs Aadhaar vs Bank name different
👉 Example:
- PAN: Rahul Kumar
- Bank: Rahul K
➡ Application may get rejected
❌ 2. Blurry Documents
- Low-quality images
- Cropped or unclear
❌ 3. Signature Mismatch
- Digital signature different from PAN
❌ 4. Mobile Not Linked with Aadhaar
- OTP verification fails
❌ 5. Wrong Bank Details
- Incorrect IFSC or account number
💡 Pro Tips (Very Important)
✔ Use Same Name Everywhere
Ensure:
- PAN
- Aadhaar
- Bank
👉 All should match exactly
✔ Keep Documents Ready Before Starting
- Saves time
- Avoids errors
✔ Use Good Lighting for Photos
- Clear image = faster approval
✔ Double Check Bank Details
- Prevents fund issues
✔ Upload Latest Documents
- Old bank statements may be rejected
🧠 Special Tips for Beginners
If you are new:
👉 Keep it simple:
- PAN + Aadhaar + Bank proof is enough
👉 No need for income proof unless:
- You plan to trade actively
📈 Special Tips for Traders
If you are a trader:
👉 Submit income proof from start
👉 Enable:
- F&O
- Intraday
👉 Choose broker with advanced tools
🔄 Offline vs Online Document Submission
| Method | Process | Time |
| Online (e-KYC) | Upload + OTP | 10–15 mins |
| Offline | Physical forms | 3–7 days |
👉 Online is faster and recommended.
📌 Do You Need Physical Documents?
👉 No (in most cases)
Thanks to e-KYC, everything is:
- Digital
- Paperless
- Instant
🧠 Real-Life Example
Let’s say you’re opening account on Groww:
- Enter PAN
- Aadhaar OTP
- Upload selfie
- Add bank details
👉 Done in 10 minutes
🔐 Are Your Documents Safe?
Yes, if you use trusted brokers like:
- Zerodha
- Groww
- Angel One
👉 They are regulated by SEBI and follow strict security rules.
📌 Final Thoughts
Opening a Demat account in 2026 is quick and hassle-free—but only if your documents are correct.
👉 The key is:
- Keep documents ready
- Ensure details match
- Upload clearly
Whether you’re a beginner or a trader, having the right documents ensures smooth approval without delays.
FAQs
- Can I open Demat account without PAN?
No, PAN is mandatory.
- Is Aadhaar required?
Yes, for e-KYC and verification.
- Do I need income proof?
Only for F&O or trading.
- How long does approval take?
Usually within 24 hours.
- Can I use joint bank account?
Yes, but primary holder name must match PAN.
🚀 Final Advice
Before starting your Demat account:
✔ Keep all documents ready
✔ Check name consistency
✔ Choose a trusted broker
👉 Because a smooth start makes your investing journey much easier.